In my opinion, no one does a smoky eye better than the Kardashian sisters and their makeup artist Mario Dedivanovic. It is always perfect whether its day time or night.
I created the smoky eye seen here prior to going out to dinner (at California Pizza Kitchen of all places...you gotta strike when the inspiration hits!!) and was so in love with the look that I wanted to share it and a few tips I have for achieving a great smoky eye.
While I have always been a huge fan of Kim Kardashians style, I am an even bigger fan of Khloe Kardashians hillarious antics, killer Louboutins, her love for Lam-Lam and her brown smoky eye.
Tips for a Successful Smoky Eye:
#1 Practice, practice, practice. The smoky eye isnt my favorite to do, but I have learned enough from my many mistakes how to properly execute it.
#2 Do all eye makeup first, then do foundation, etc. You will be cleaning up ALOT of fallout from dark, deeply pigmented shades. It would be a shame to redo your face makeup because of cleanup.
#3 For clean up, you can either apply eye cream to a Q-tip and gently remove excess makeup. You may also use Q-tips that are prefilled with oil free eye makeup remover (my favorites are from Almay and Bare Escentuals) which is a very fast option for clean up when applying a smoky eye to a friend or client.
#4 Blend, Blend, Blend. When you think you have blended all of the color out, blend some more. My favorite blending tools are the MAC 217 brush and the MAC 224 brush.
#5 If you do not have enough blending brushes to switch to clean one for further blending, rub your blending brush on a tissue or napkin to remove excess pigment. If you are not removing the excess color from your brush, you are only moving the eyeshadow that you blended out to another area of your eye.
Check out my smoky eye here!
Tuesday, July 19, 2011
Saturday, July 2, 2011
Get It Together!
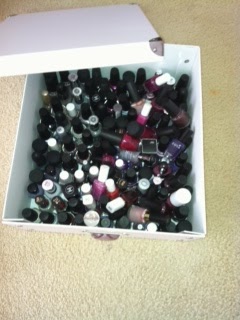
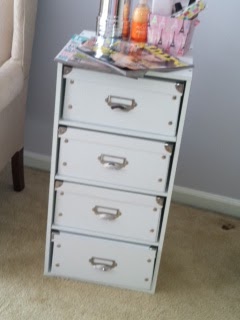
I am the first to admit, I have not ever been the most organized person. It causes a lot of aggrevation and I waste valuable time. With some assistance from my sister, I created a cabinet that should help keep my massive amounts of nail polish organized.
Thanks to the lovely ladies on Makeup Alleys nail board, I was turned onto what they dub as "melmers." Containers similar to Ikeas Helmers, that are a tad cheaper, especially if you have a coupon. It was not too complex to build and holds everything quite nicely.
Each bin is organized by colors and slide out quite easily. I have a few more projects like this in mind to keep my makeup organized as well. I can not tell you how much time this cabinet has already saved me when I prepare to paint my nails!
Subscribe to:
Posts (Atom)


